
If you’re familiar with Google Workspace, you may already know that Google hosts online apps that enable user productivity. One of these apps is Google Sheets. Google Sheets is a free web-based spreadsheet app that you can access from a trusty Chromebook, mobile device, and any other gadget with web browser and app support.
Google Sheets has some handy settings you can change, like the locale, the functions settings, and filters. Whether you’re a new or experienced user, you will want a good handle on these Google Sheets settings, so we rounded up the top ones you should change immediately.
Related
8 ways to use Gemini in Google Sheets
Google Sheets with Gemini is guaranteed to make your day easier
8
Make your spreadsheet available offline
Continue to number-crunch while the Wi-Fi is off
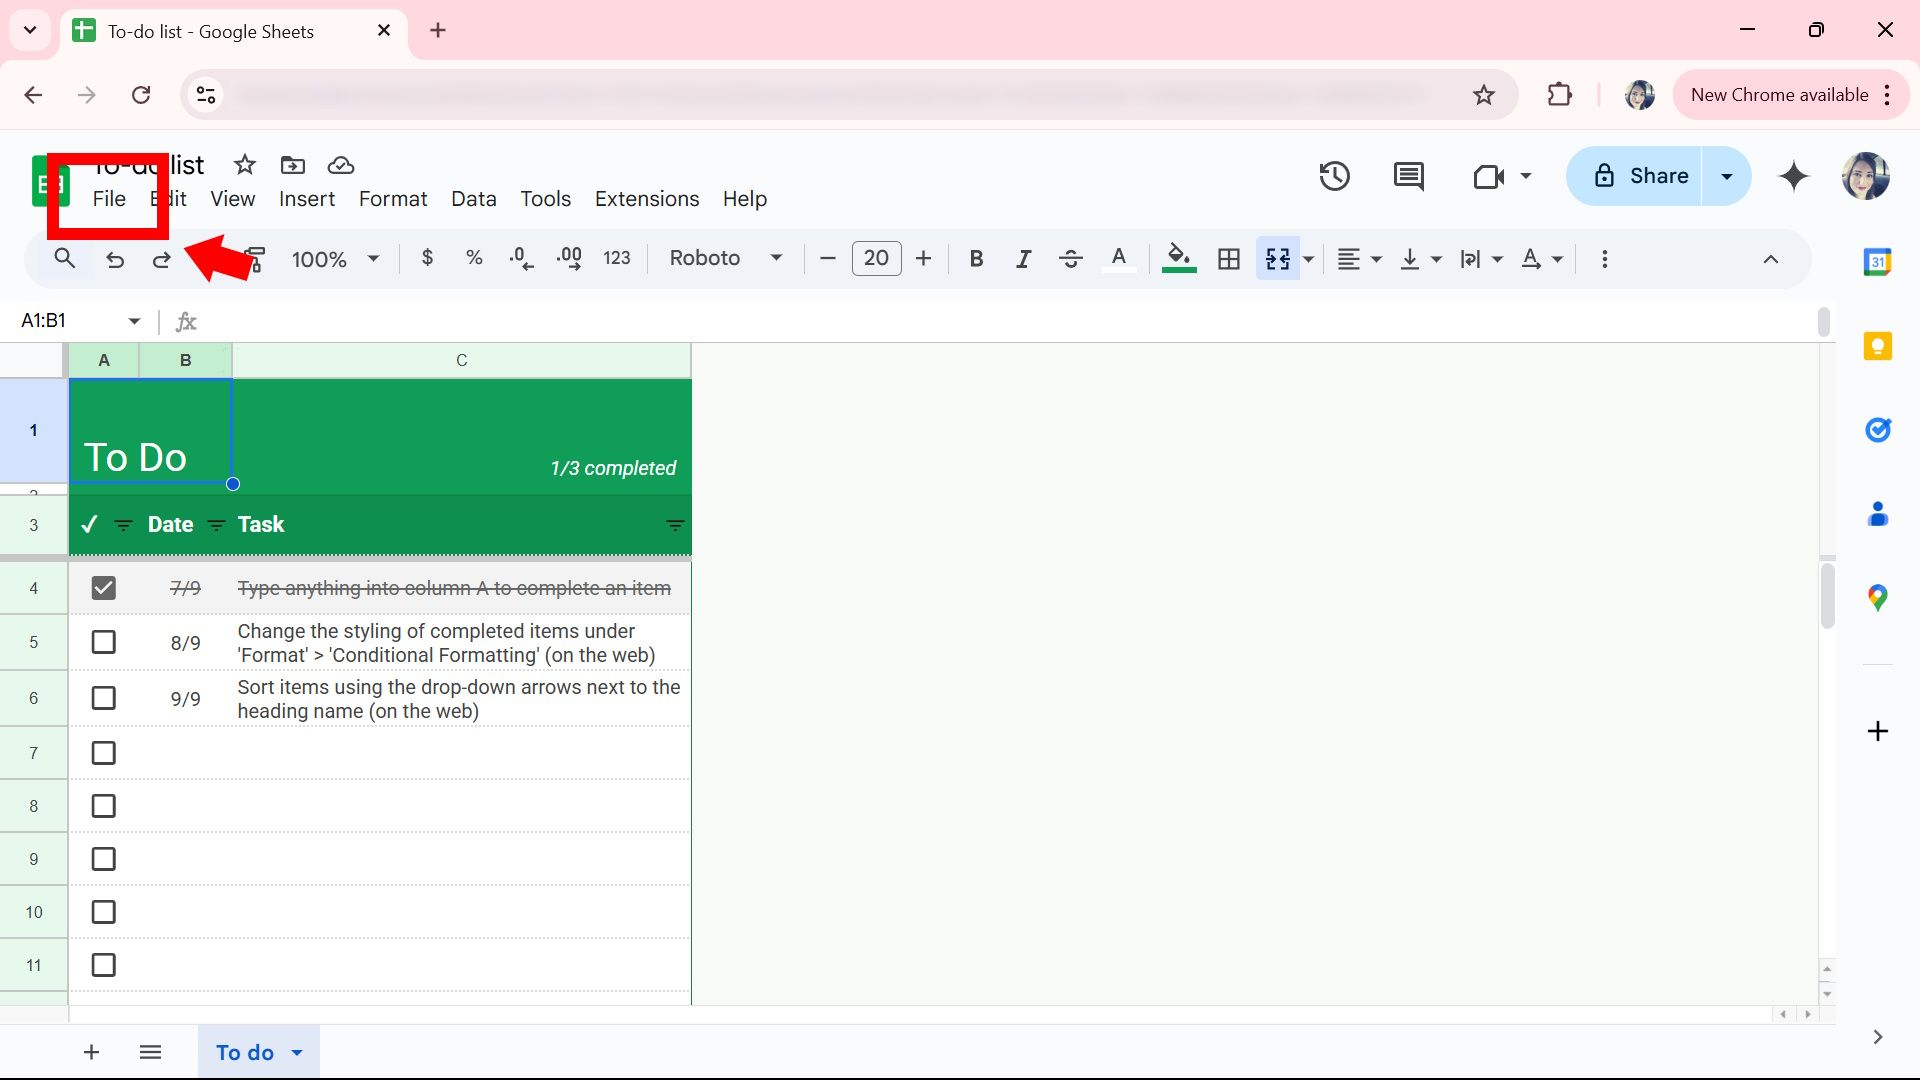
One of the first settings you should change is making Google Sheets available offline. This helps avoid the pressure of connecting to a network when you want to continue working on a spreadsheet. The only caveat is you have to set this up for offline use while you’re online. To do this:
- Open Google Sheets.
-
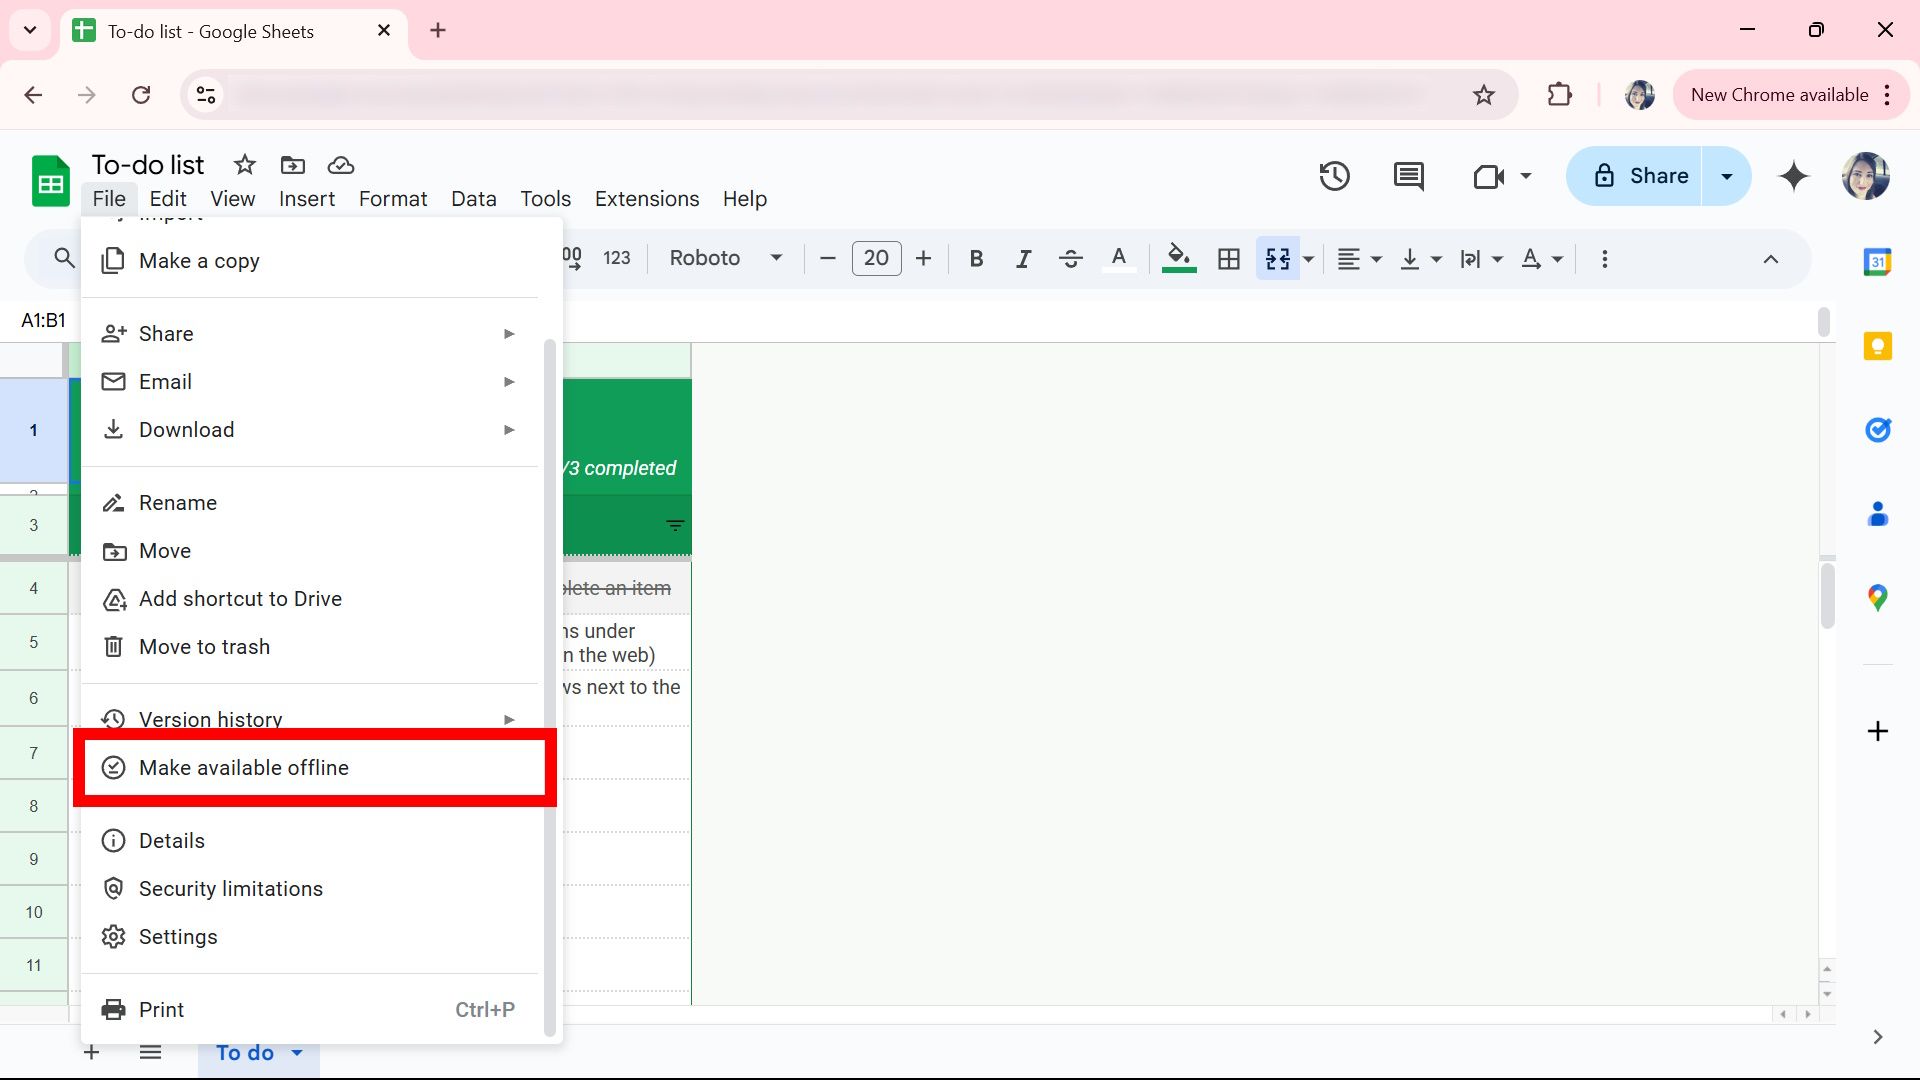
Navigate to File.
- Click Make available offline.
-
Select Turn on.


Avoid this setting if you share your computer or device. Enabling offline mode means others can have free access unless your account is password-protected. You can undo this action by navigating to File > Remove offline access.
You can also enable offline use via the mobile app by opening the Google Sheets app, selecting the Three-dots icon, and tapping to toggle on Available offline.
7
Set data protection
Do this before you share your data
Data is sensitive, but mistakes can happen. If you’ve given everyone free rein to edit the sheet, you may want to opt into protecting data in cells before sending it off. To do this, go to Data > Protect sheets and ranges. It allows you to choose who can edit this range or show a warning when editing that range. It’s handy if your team is considerably large and you hope to avoid anything being overridden by mistake.

Furthermore, if you’re still worried about sending off the master sheet, consider sending a copy or using an add-on like Autocrat to merge your spreadsheet into Docs or PDFs.
6
Change your locale and time zone
Set your preferences for your location and time
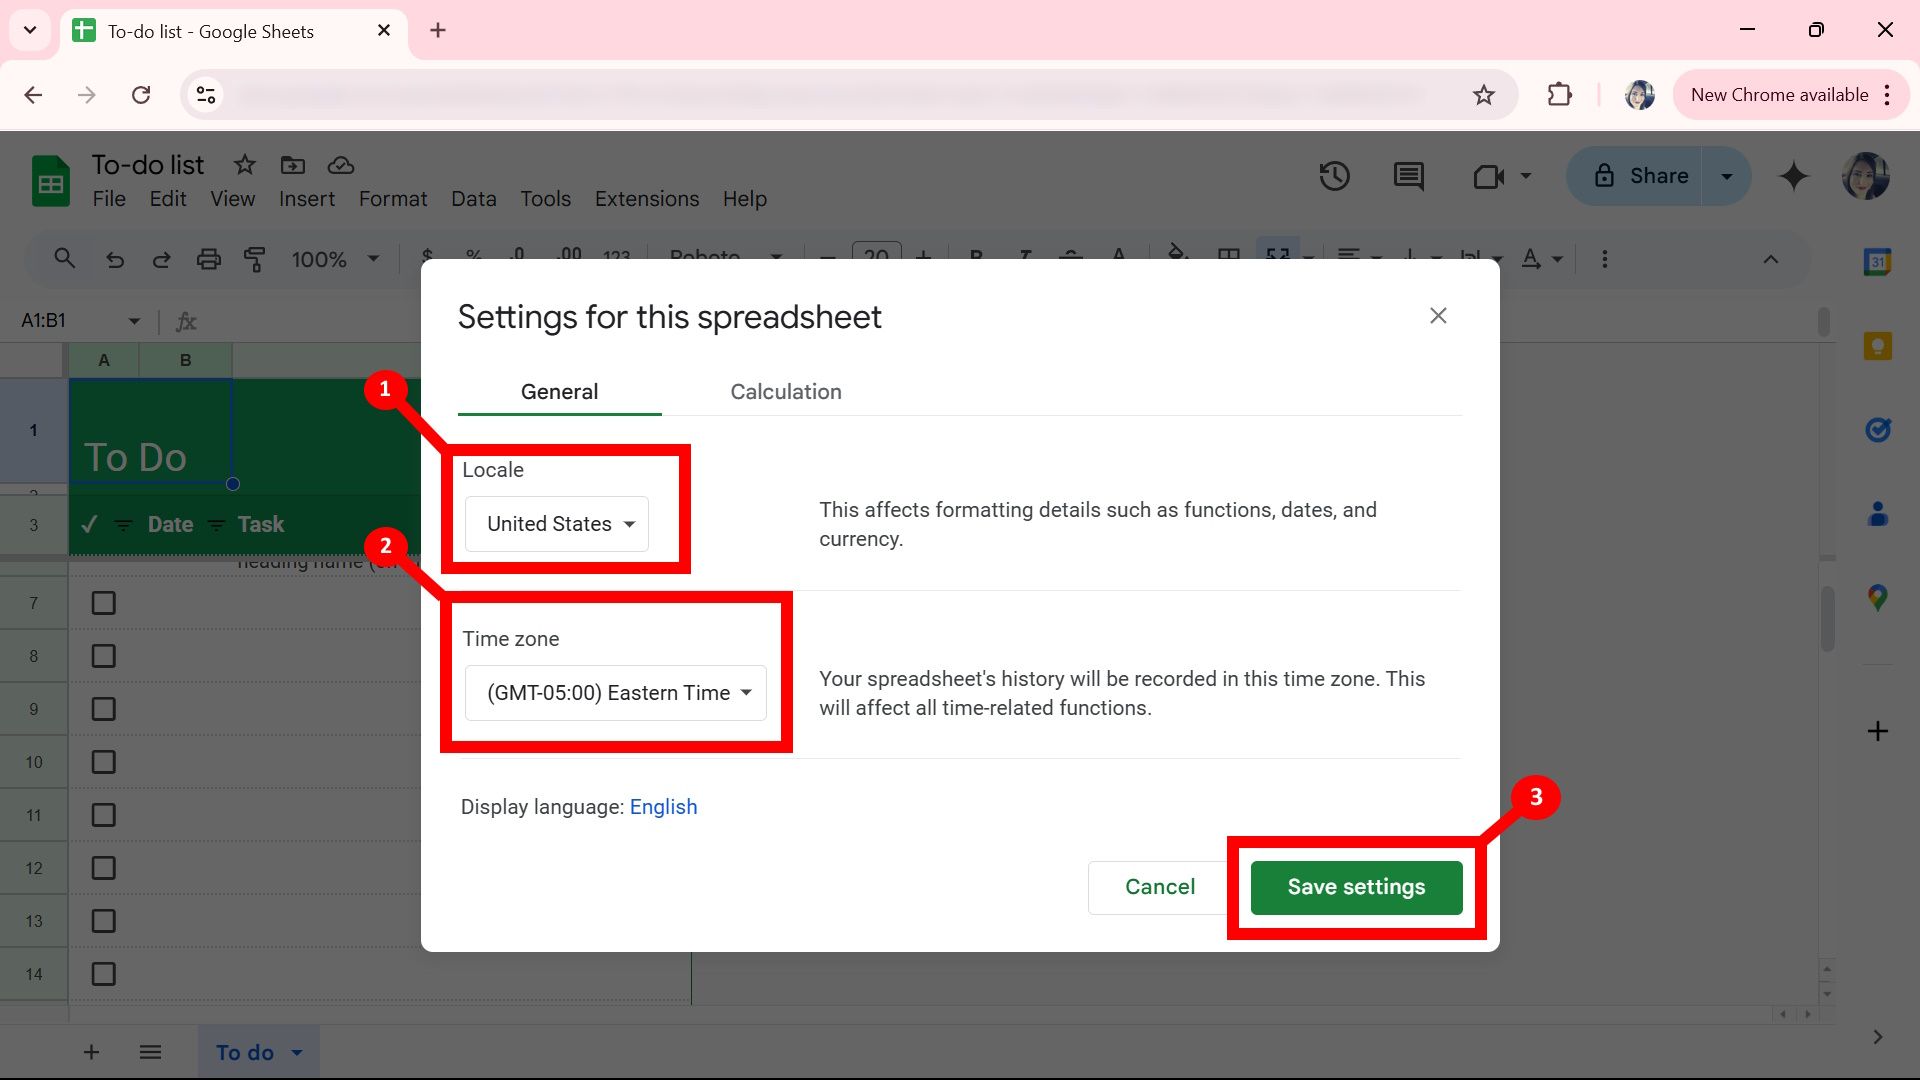
Changing your locale and time zone is more for personal preference, as seeing timestamps in other time zones might become confusing. You can change settings to specify your location and time zone. To do this, go to:
- Open Google Sheets.
-
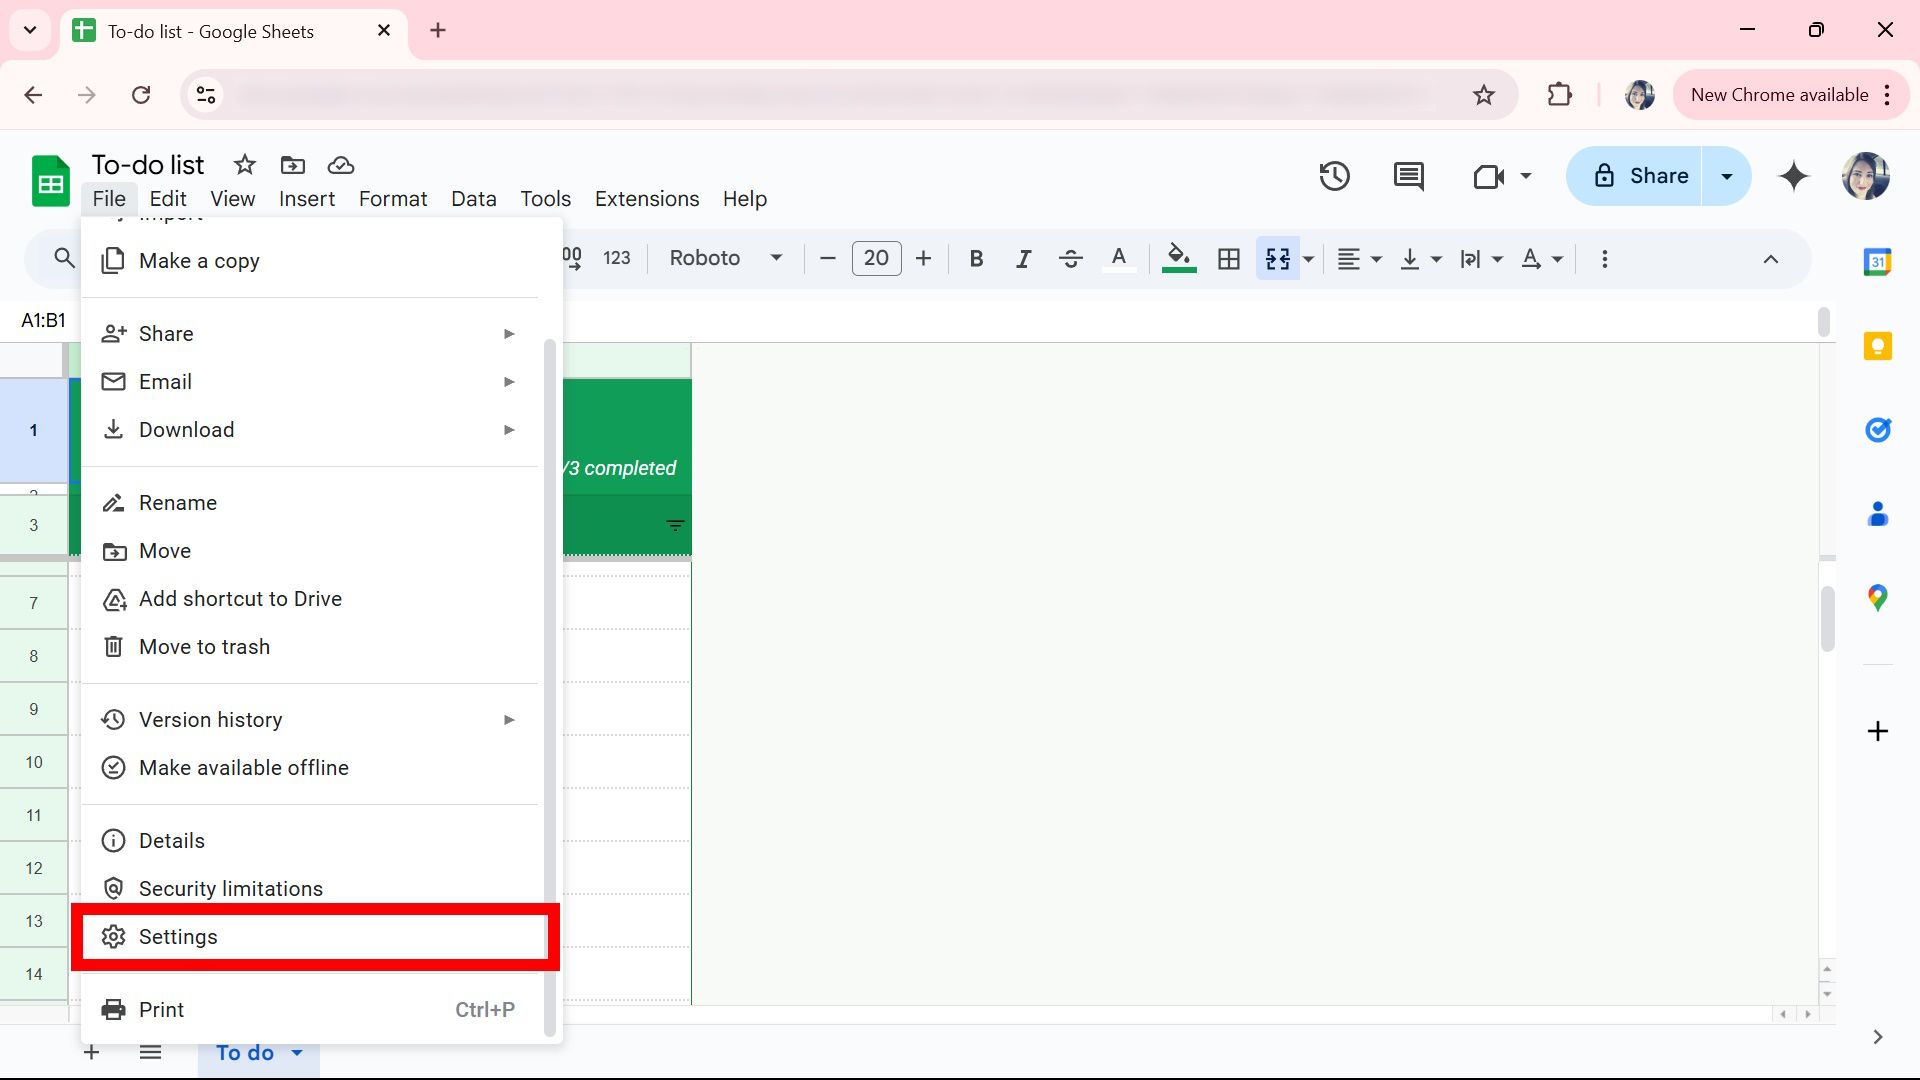
Click File.
-
Select Settings.
- Change the locale and time zones in the respective dropdown menus.
-
Click Save settings.


5
Add a shortcut to Google Drive
Keep your documents all in one place
One part of a project might mainly be data-driven. Still, your colleagues might need context to collaborate appropriately, such as how the data was measured, the context, and recorded variables that may have been excluded. Showcasing the big picture in Google Sheets is difficult without sending multiple files with your spreadsheet.
You can add everything together by saving everything to a Google Drive folder, along with all the data, so if others need to make copies, they can also use the same Google Drive folder. Google Sheets has an easy way to add a shortcut. Here’s how:
- Open Google Sheets.
-
Click File.
-
Select Add shortcut to Drive.
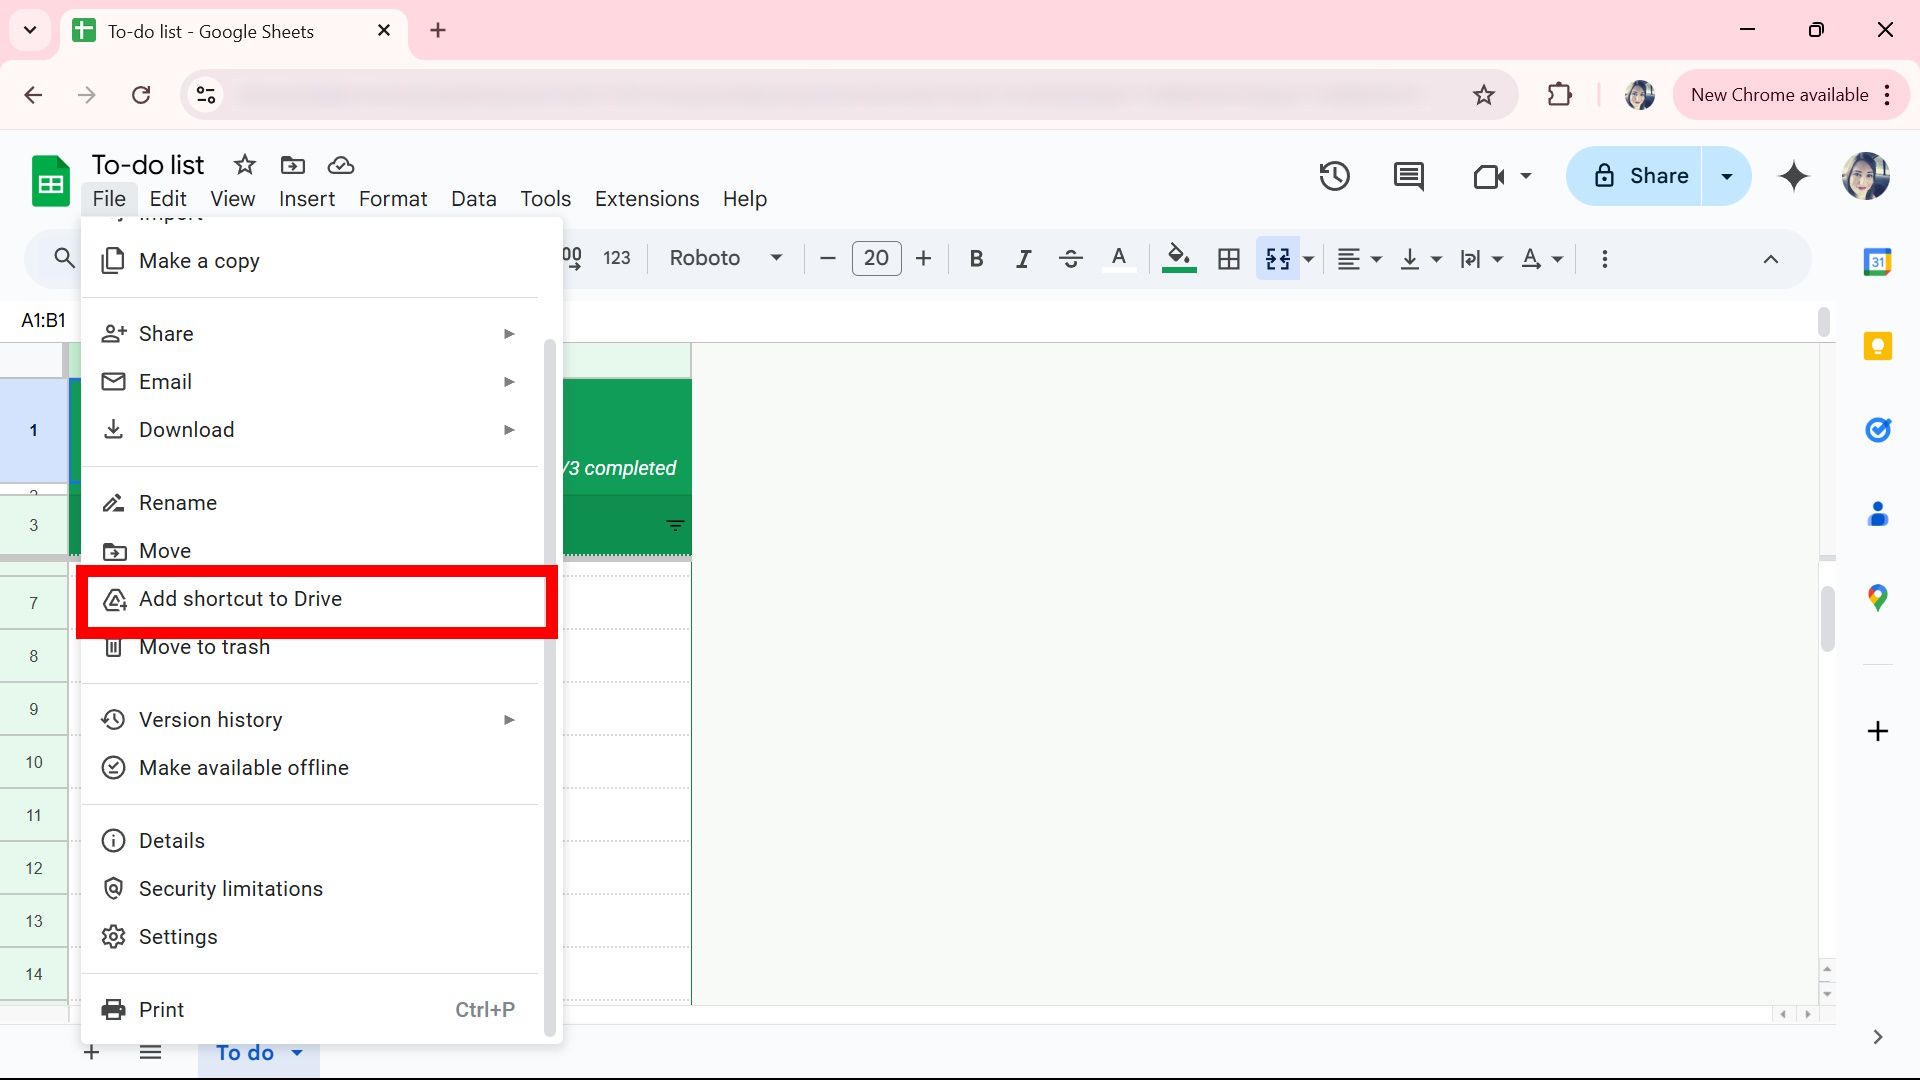
- Choose a location path in your Drive or create a new one.
-
Click Add.
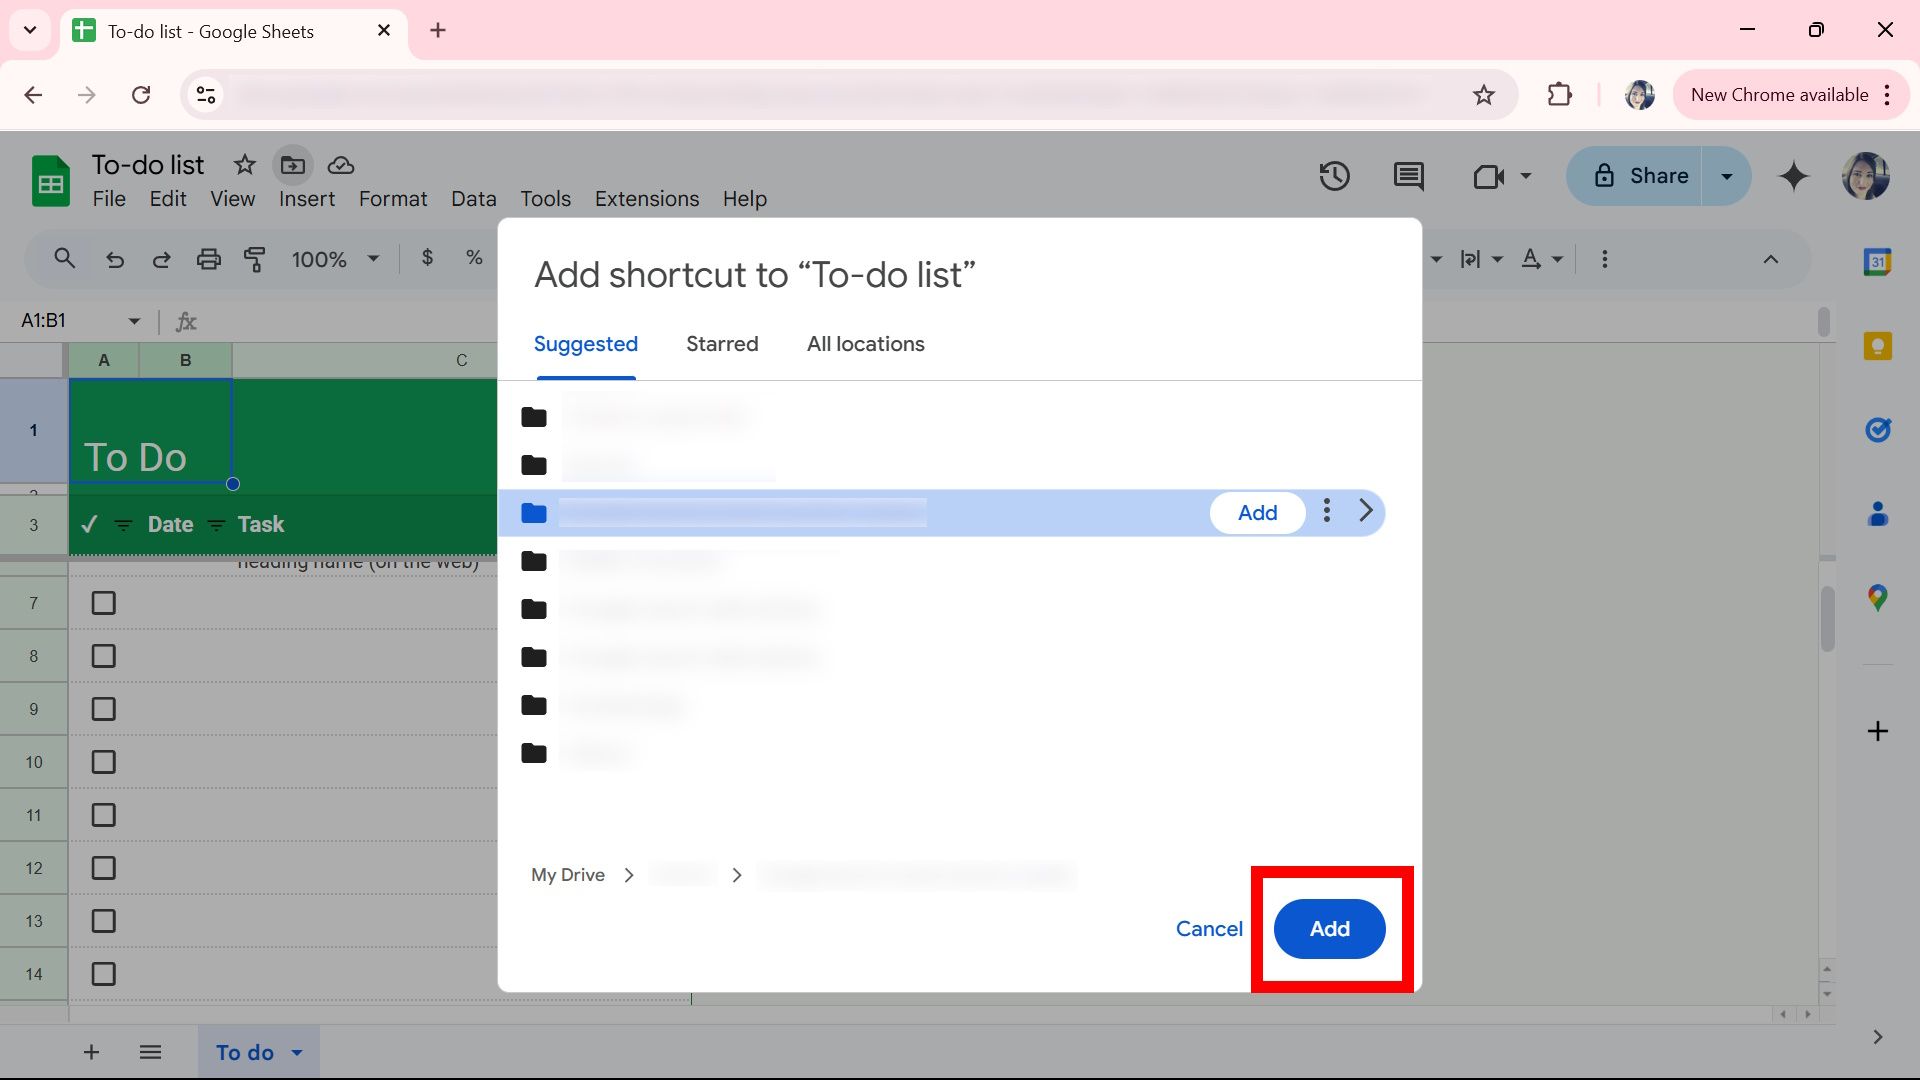


You can also move this to another directory by clicking the Move icon (it looks like a small folder with an arrow pointing right) next to the Cloud icon at the top.
4
Customize your notification settings
Receive alerts as changes happen
Another setting we recommend changing is setting up notifications for yourself so you remain in the loop when others make changes. You can customize the settings to know when changes are made. You can even set it to receive notifications when a user submits a form and how often you want to see those notifications.
You should change this depending on whether you want to see more or fewer notifications depending on the project. To customize your Google Sheets notifications settings, go to:
- Open Google Sheets.
-
Click Tools.
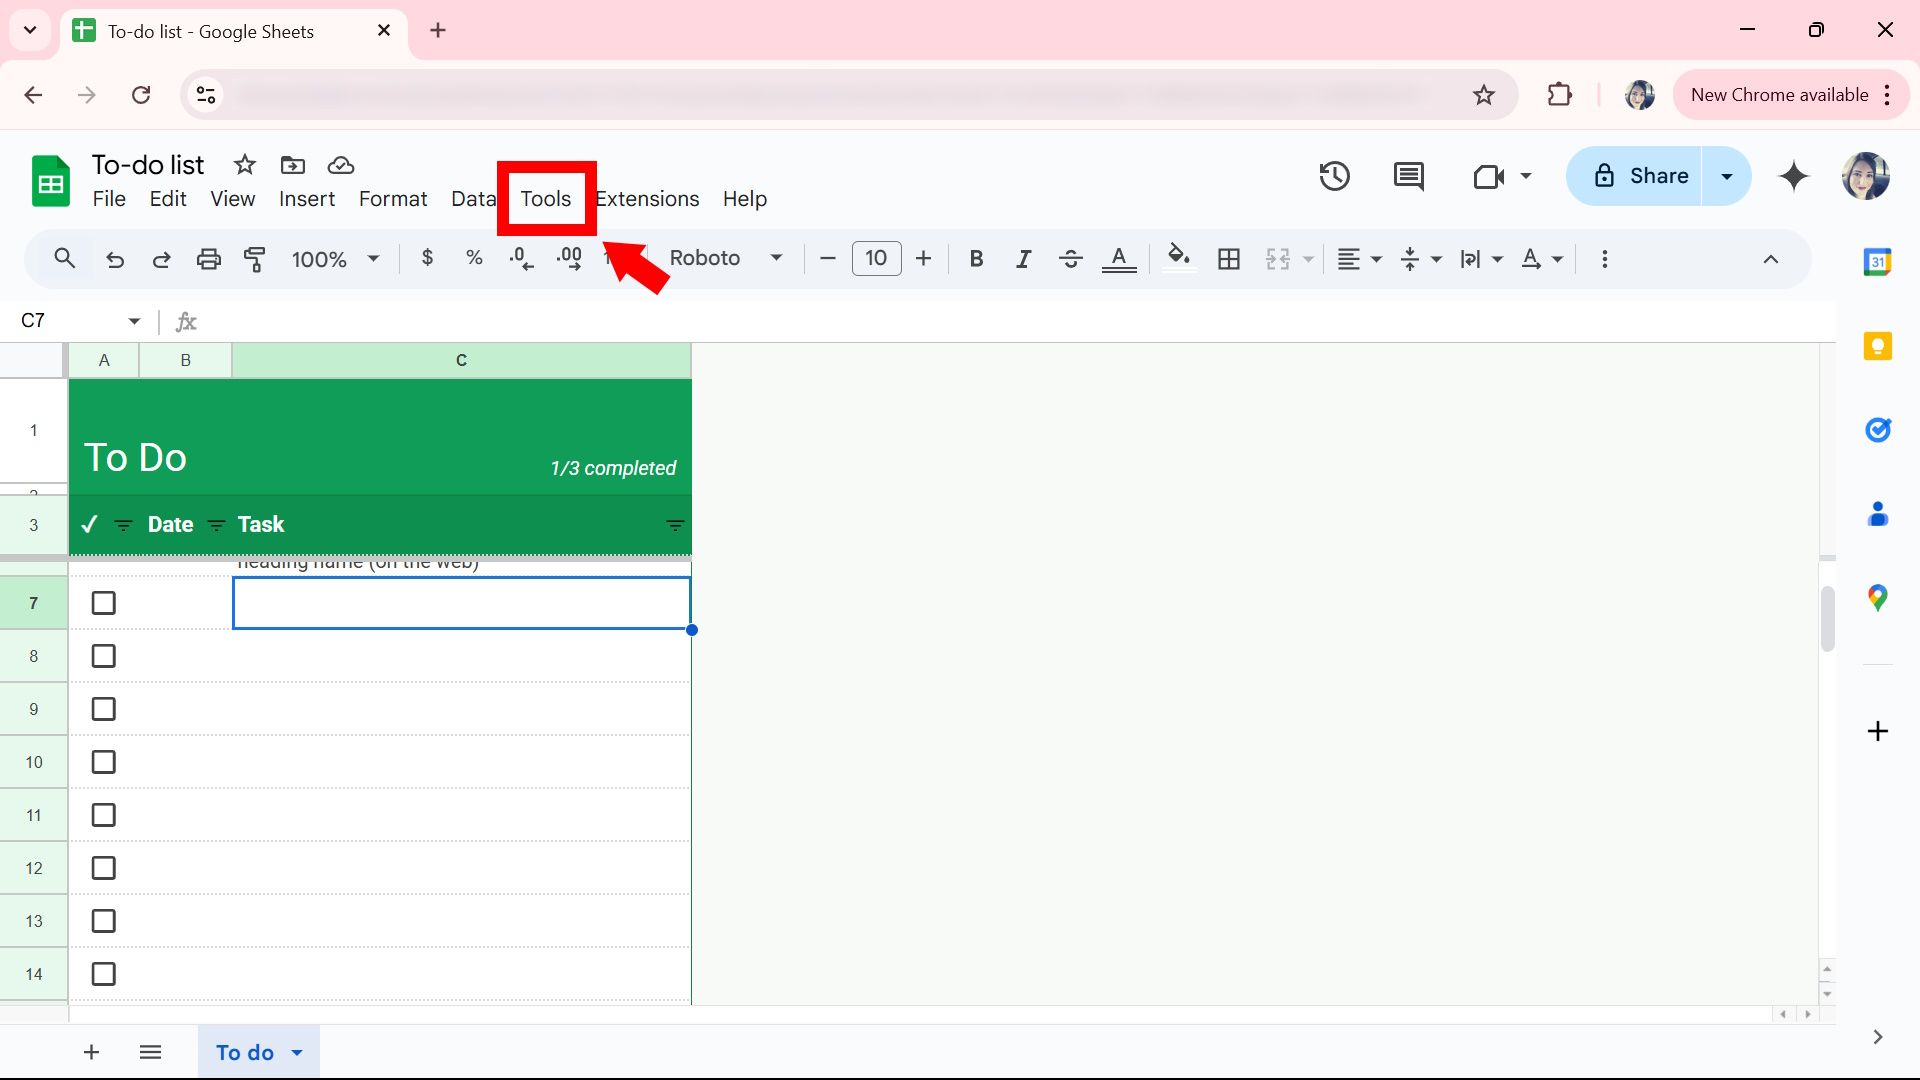
- Click Notification settings > Edit notifications.
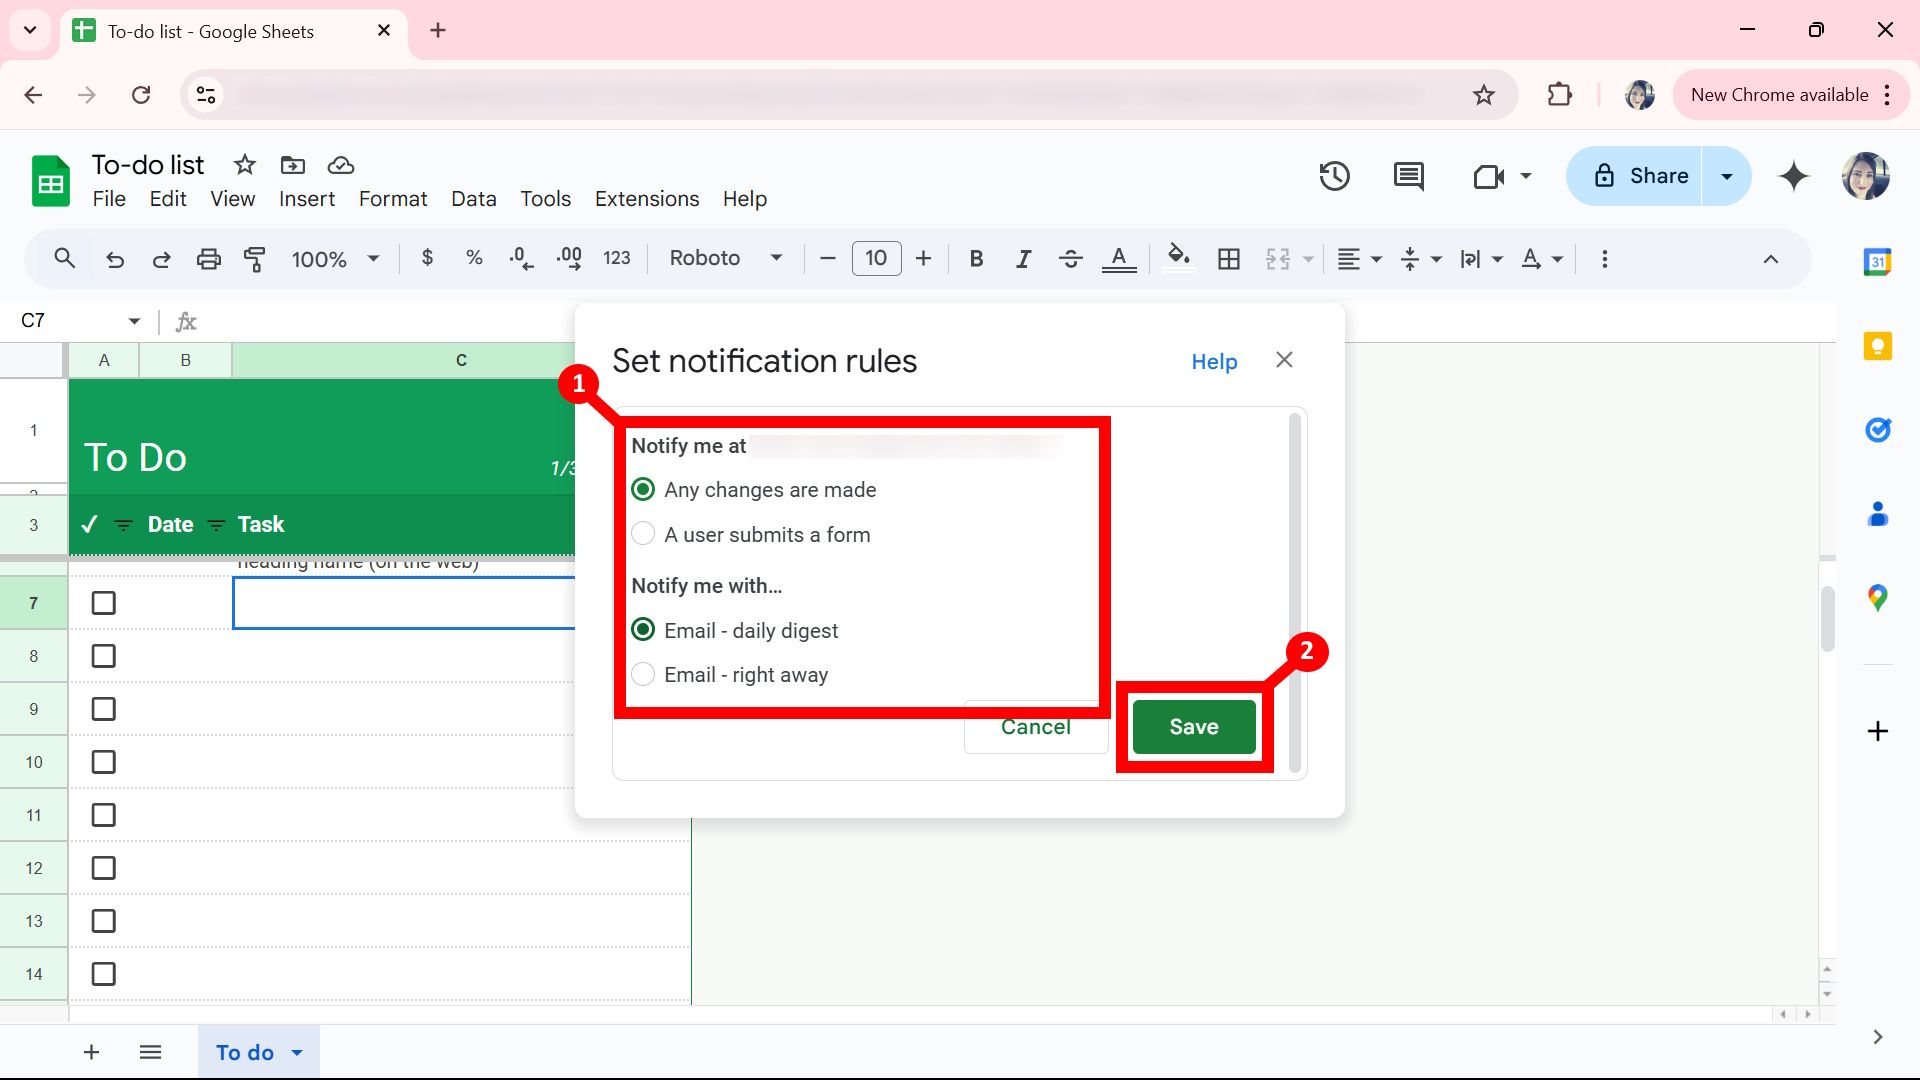
- Select Any changes are made or A user submits a form.
- Choose Email – daily digest or Email – right away. The daily digest option sends a summary of changes to your email address once a day.
-
Click Save.


You can set more than one notification rule. For example, if you want alerts for users submitting forms and changes being made, you can set a second rule containing the other option. If you need to turn off these alerts, you can revisit the Notification settings, click Delete on the notification rule, and select Ok.
3
Add pre-built tables to your spreadsheet
Avoid starting from scratch unless it’s necessary
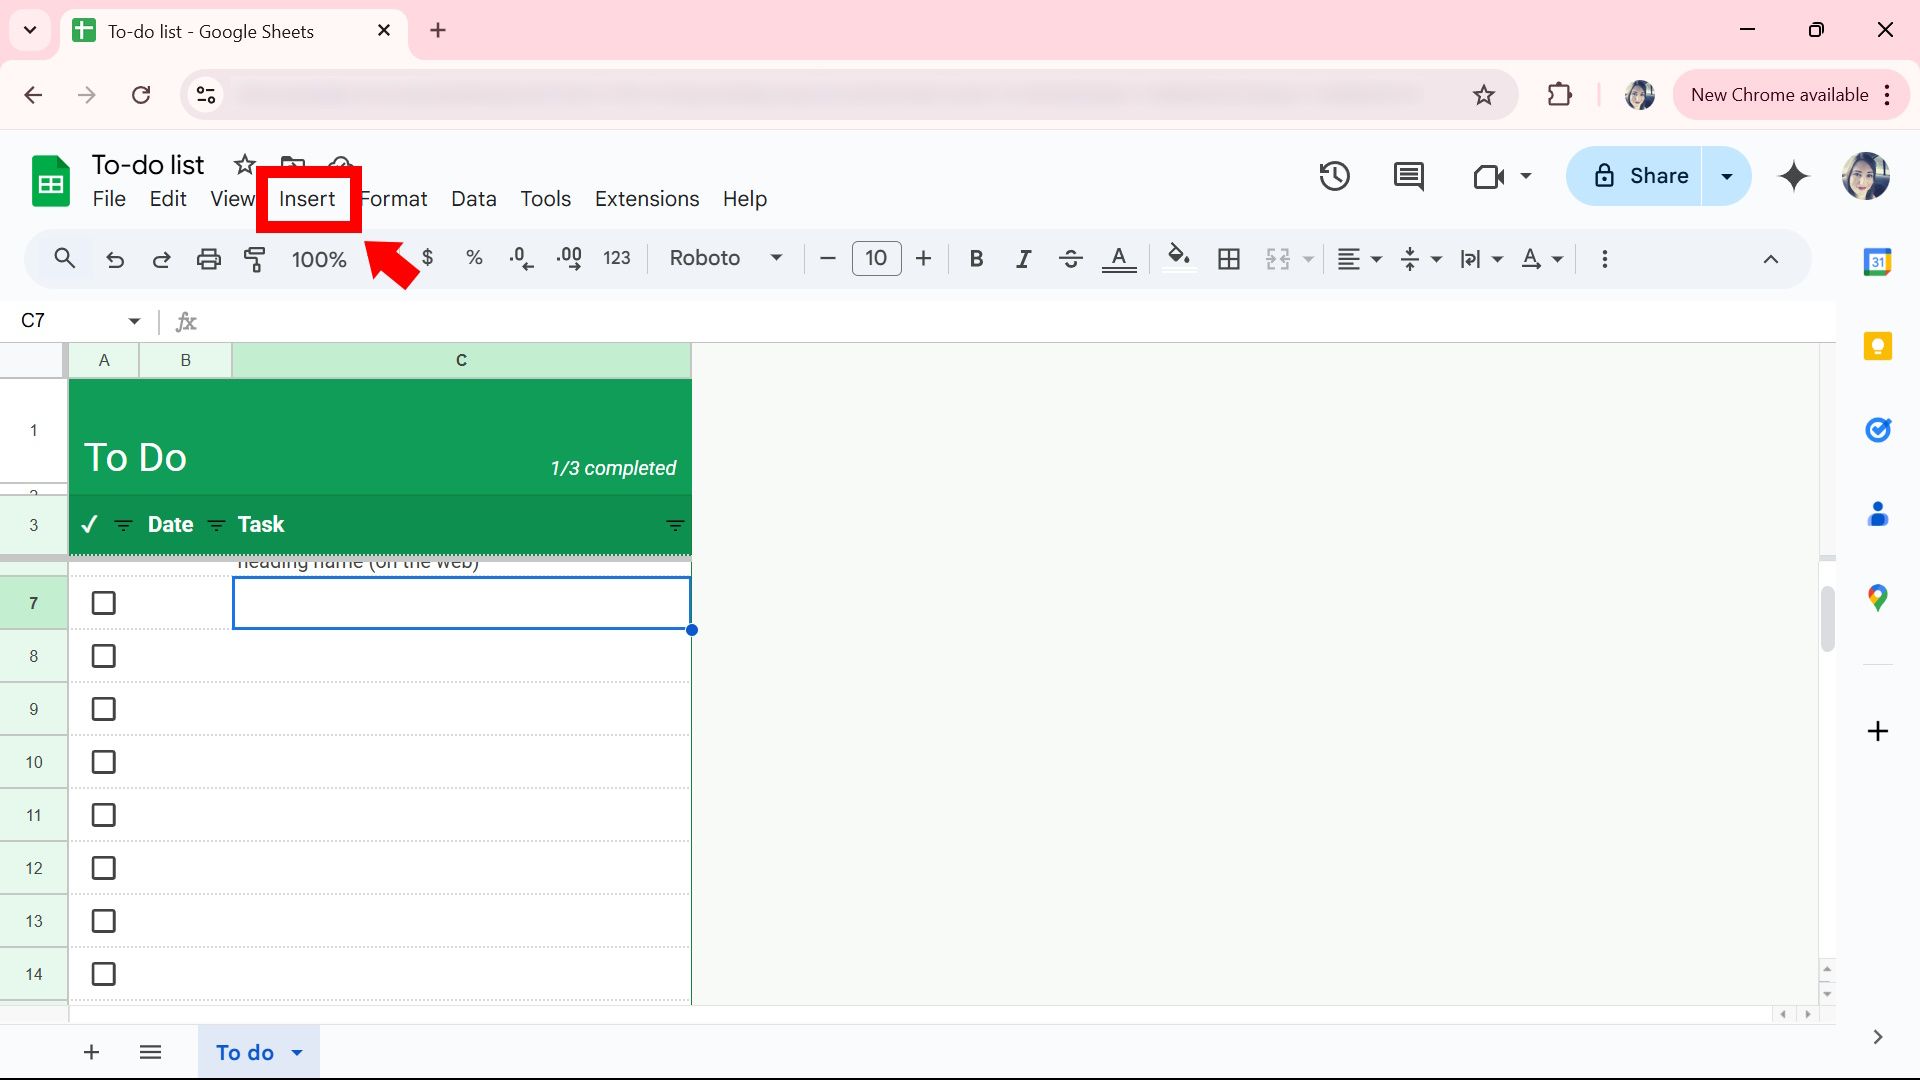
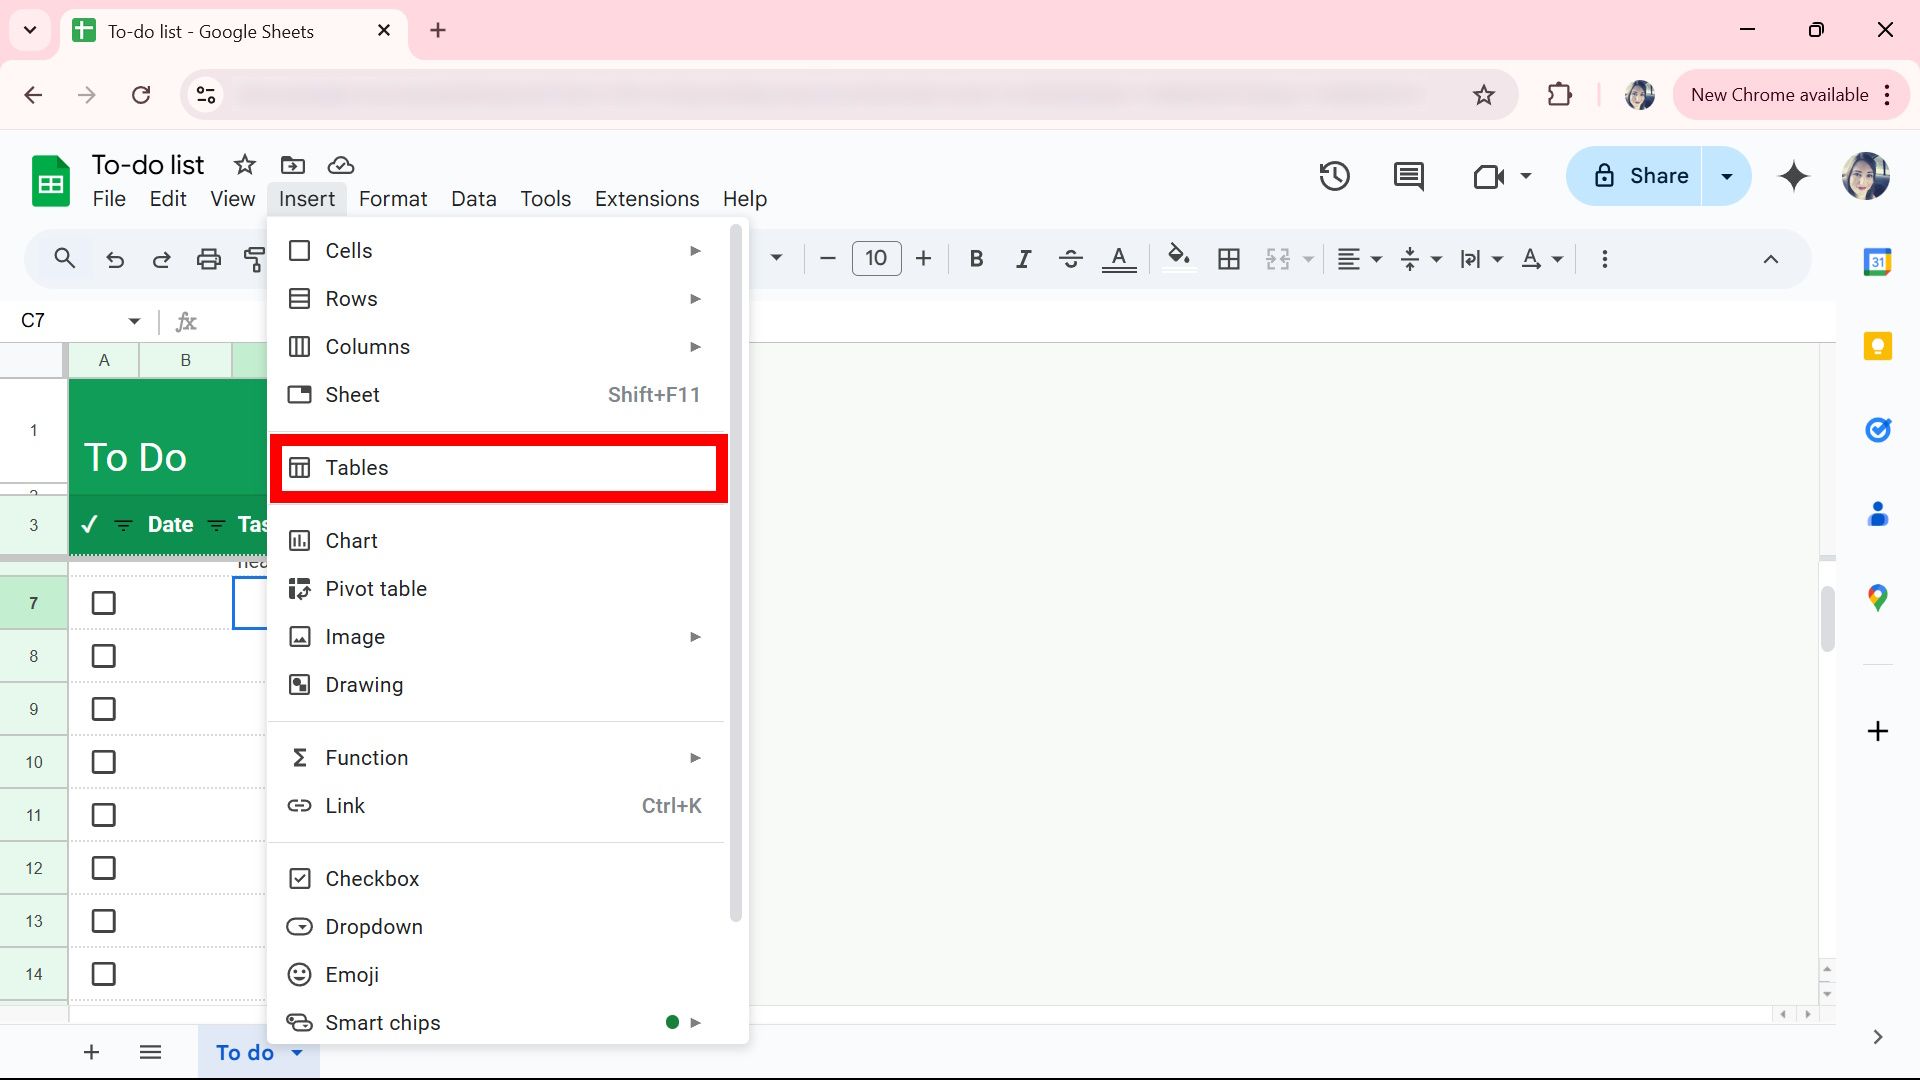
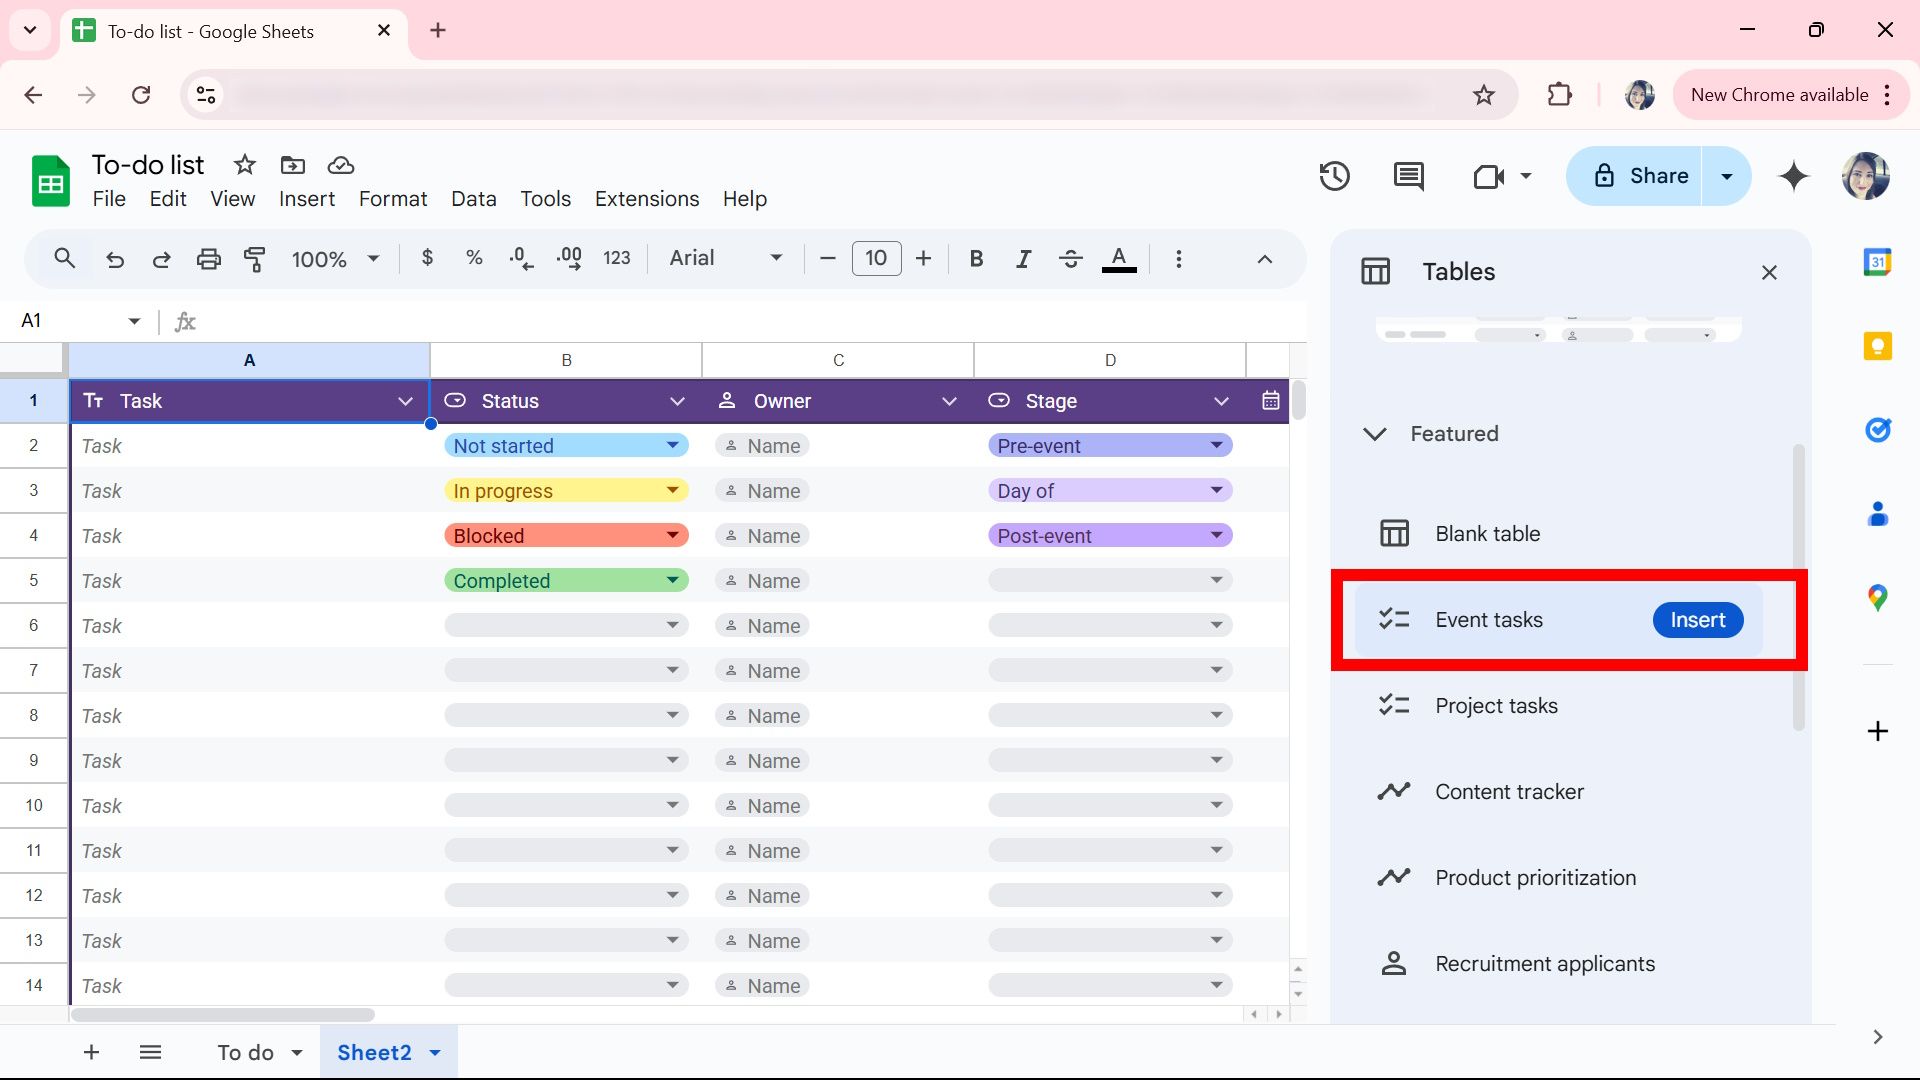
Google Sheets also has templates you can insert before creating your own. These tables have predefined structures that cover common use cases. This option becomes useful when you have a new data set but don’t know how to structure it; you can work with a pre-built table and make the necessary tweaks. To insert a pre-built table, go to:
- Open Google Sheets.
-
Click Insert.
-
Select Tables.
-
Choose a table from the preview list, and click Insert.


You can also insert a table using the @ symbol inside a cell and select Tables under Components.
2
Apply filters for improved viewing
Make your spreadsheet appear less busy
When you’re creating a master data sheet, the entire document starts to look busy. That’s where filters come in handy. You can use filters to view specific rows and columns. You can save these filters using the Create New Filter View function. Here’s how:
- Open Google Sheets.
-
Click the Filter icon or navigate to Data > Create filter view.
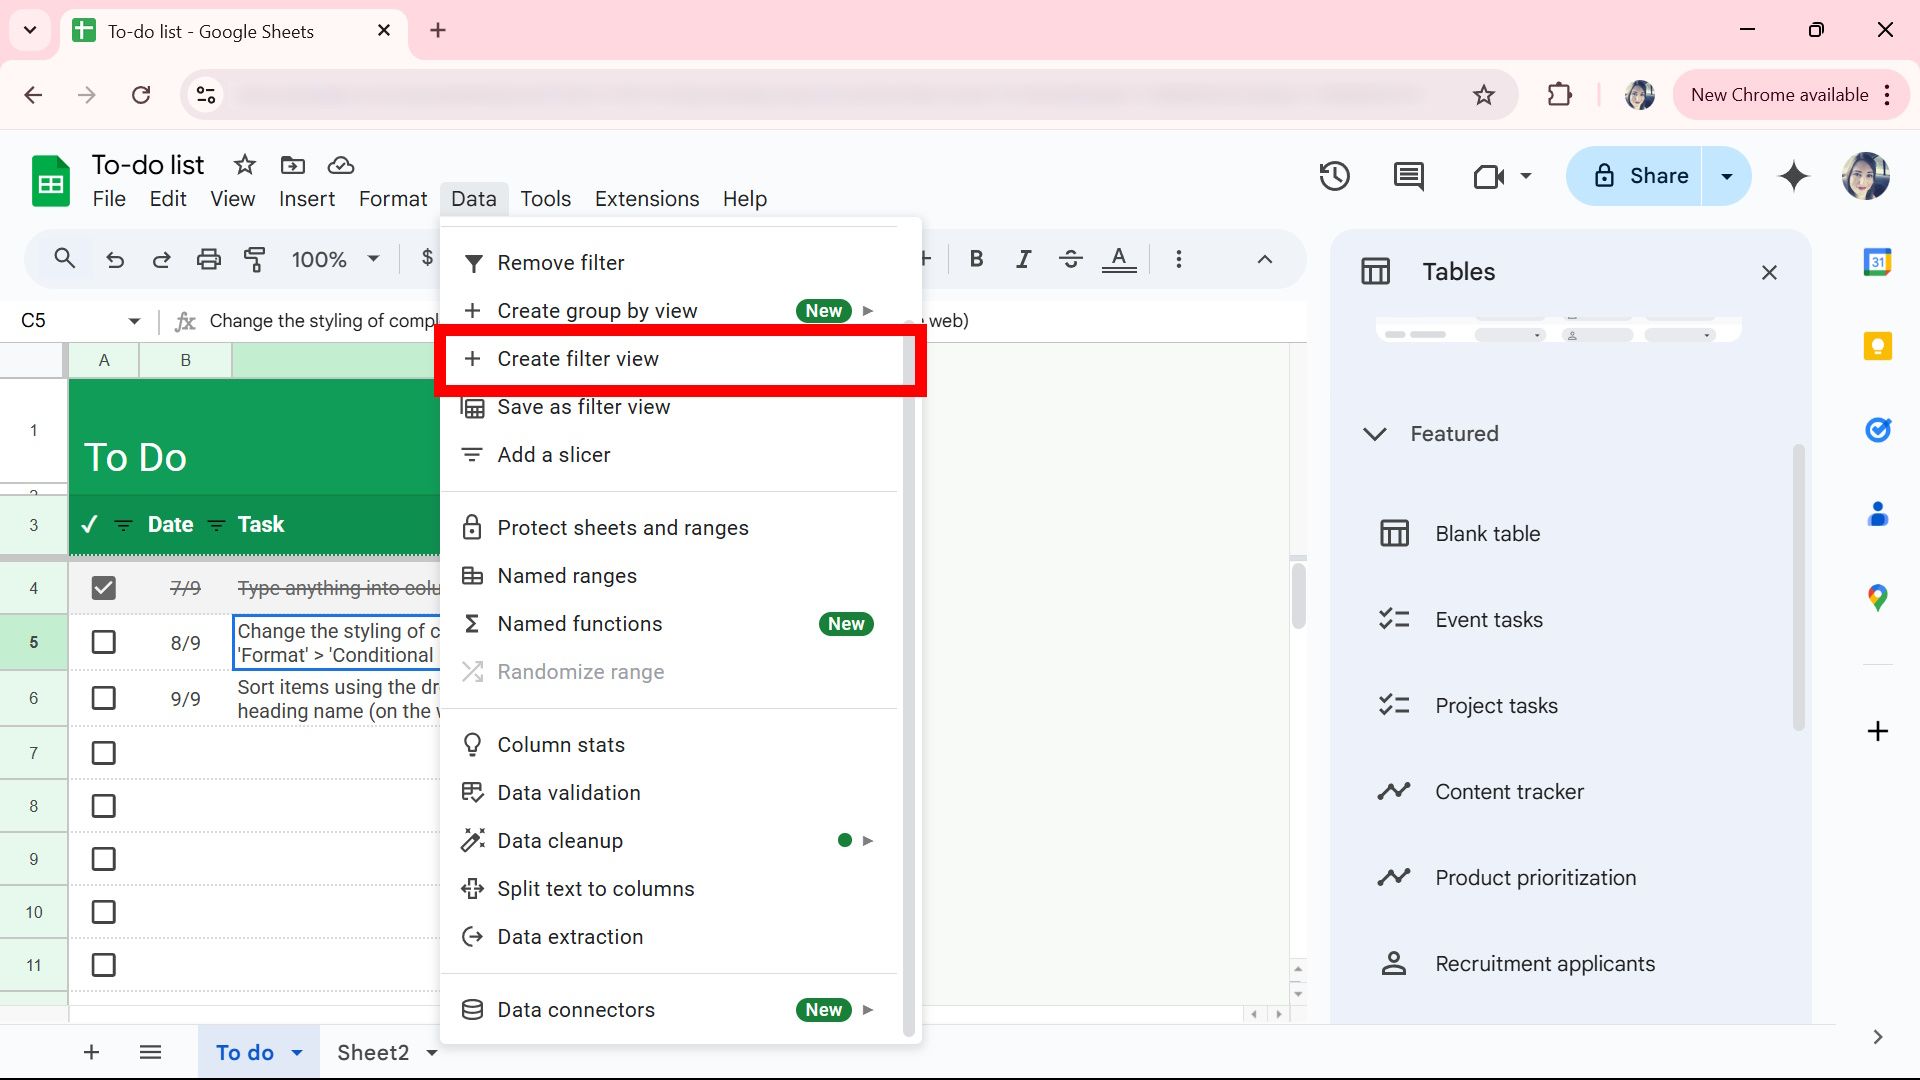
- Select the values to include; you can also specify the range.

The mobile app also supports creating new filters. To get started, tap the column/row on which you want to apply the filter, then navigate to the Three-dot icon and select Create a filter.
1
Remove white spaces in your Google Sheets
Tidy up your spreadsheet with a single click
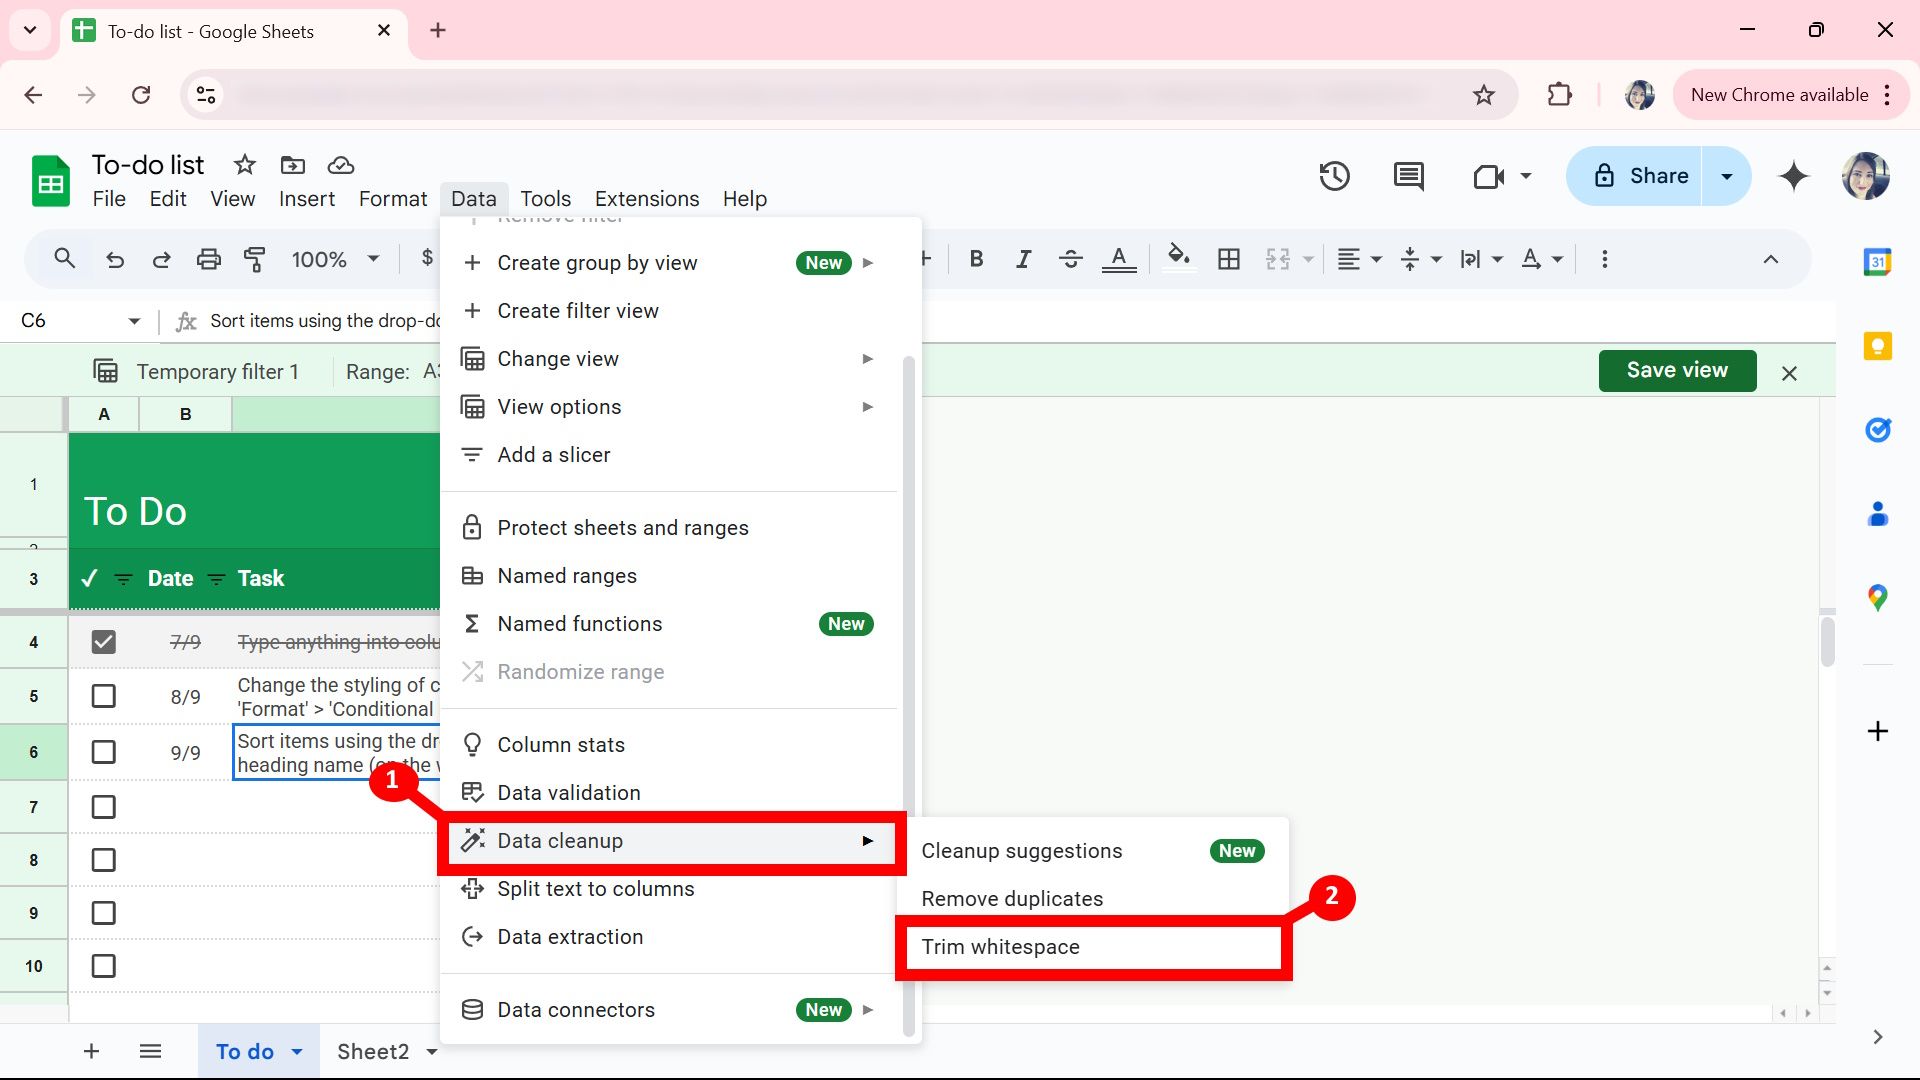
White space can add girth to your spreadsheet, making the sheet awkward to look at. It can sometimes happen if you import your data from another source. Fortunately, you can clean your spreadsheet very quickly without much input. Here’s what you need to do:
- Open Google Sheets.
- Click Data > Data cleanup.
-
Select Trim whitespace.

Non-breaking space, like  , will not be trimmed.
Keep an eye on AI Teammate
Outside of Google Gemini, there is still more that Google has in store for AI integration with our current Workspace apps. During Google I/O 2024, Google spoke about implementing a virtual teammate for Workspace accounts. The official name is AI Teammate, which Google outlined as a way to monitor and track projects while helping with analysis, facilitation, and organization. This may shake up your current workflow when it comes out, so keep an eye on when or if Google plans to bring it.